 | Hello Guest - Sign In or New Account |
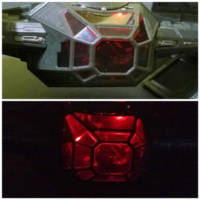
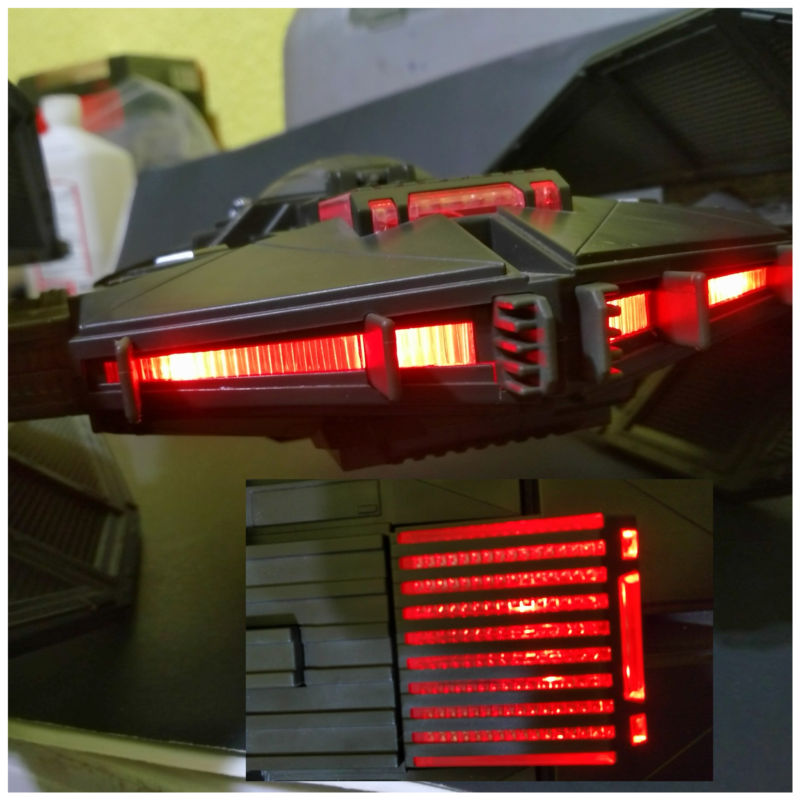
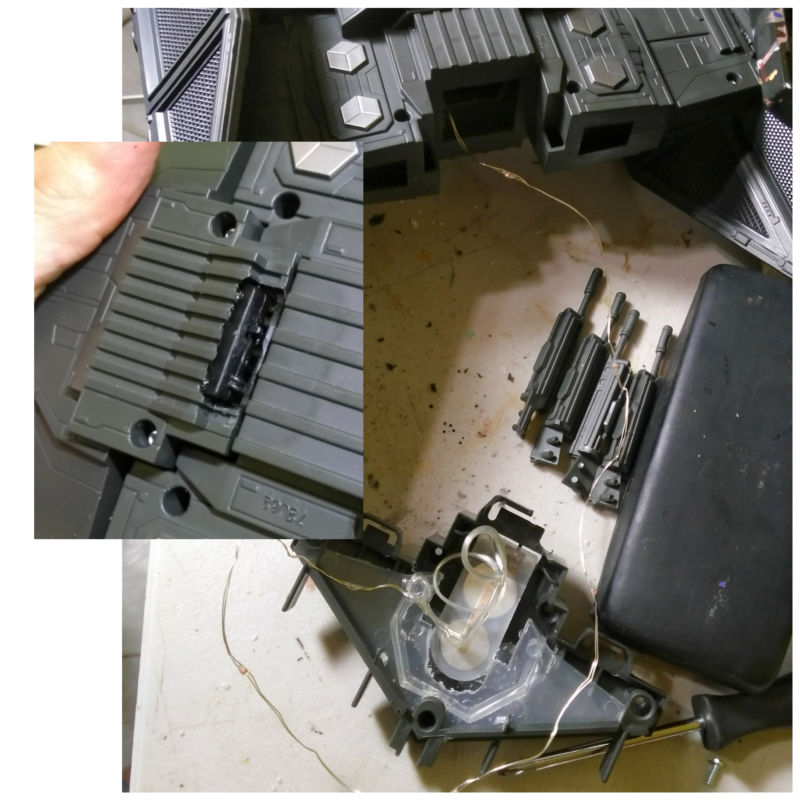
This is something different. I didn't feel like taking on a challenging job today. This is a basic installation of red LED lights with a manual switch and batteries into Kylo Ren's Tie Silencer. I completely removed the Force Link chip. So now I don't need a force link bracelet to enjoy the lights. Here's a basic tutorial. Anybody can pull it off. Please visit my page on Facebook- Kobocop Custom Action Figures- and give a like if you appreciated this advice! Materials needed: LED string lights with battery box less than $2 on eBay. (Button type battery) Batteries for the lights (cheap on eBay) Hot glue Rotary tool with large drill bit Screwdrivers Packing tape Long & curved surgical pliers or needlenose pliers Pry the tail piece off and unscrew it open. Dremel drill a hole in the middle of the main ship hull where the tail plugged in, behind the cockpit seat, but be careful not to drill through the spring blaster ejection mechanism. (It's on top right under the button. Drill out two holes in the cabin where Hasbro put clips to hold the lightsaber. Next drill off a small section of plastic on the plug of the tail piece to let the light string run through. DO NOT DRILL THE CLIP PARTS THAT HOLD IT ON! Thread the end of the light string through the large hole you drilled in the back to those small holes, use the pliers then hot glue in place. It's a bit tricky to work around the firing mechanism channel. Next drill a hole to put the battery box exposing the switch as shown in the photos. Make sure the battery door is facing up when the unit is open so you can change them later. Use hot glue to hold in place against the hull. Drill out the transparent glass piece where it hits the battery box until there is enough space for the battery box and you can close the unit. Now arrange the remaining lights and secure them to the glass piece with packing tape. Experiment with placement to get the brightest light. Close it up and don't forget the screws!  |
| Batpod |  | Submission Order |  | Snake Eyes |
| Jedi General | | Star Wars Series | | Redleg - Arachnos Jedi |
| 3.75" Weathered Blue Resistance X-Wing Fighter | | Created by 1kobocop | | 3.75" ROTJ Final Scene Darth Vader |


 Update Your Custom
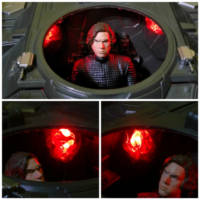
